10:48 | March 22, 2015

SIMPLE UPDO

Beauty

Simple-Hair-1

Simple-Hair-5

Simple-Hair-3

Simple-Hair-2

Simple-Hair-4


Good morning loves! How was your weekend? I honestly had the laziest weekend ever and it was freaking amazing. It is rare that I just don’t really do anything and chill in bed and watch Netflix, so it was a nice change to do that for once this weekend.

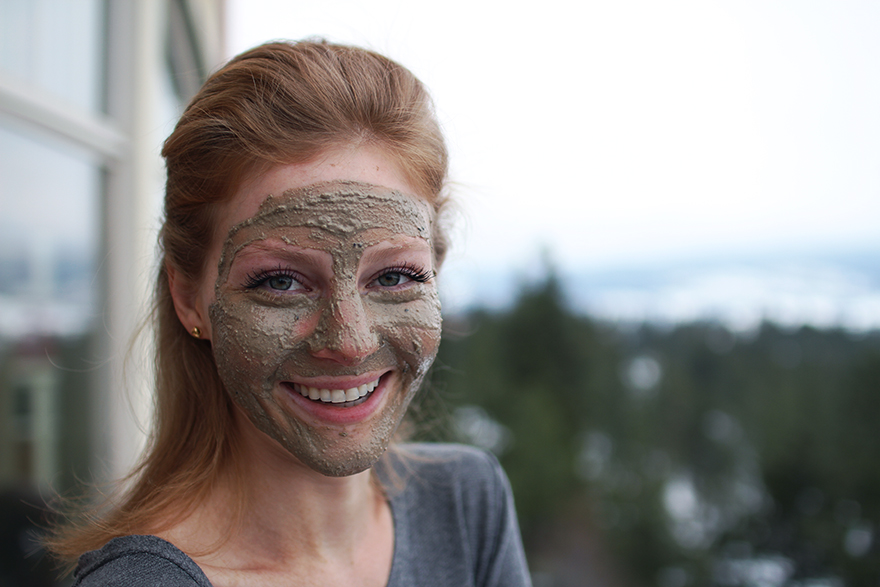
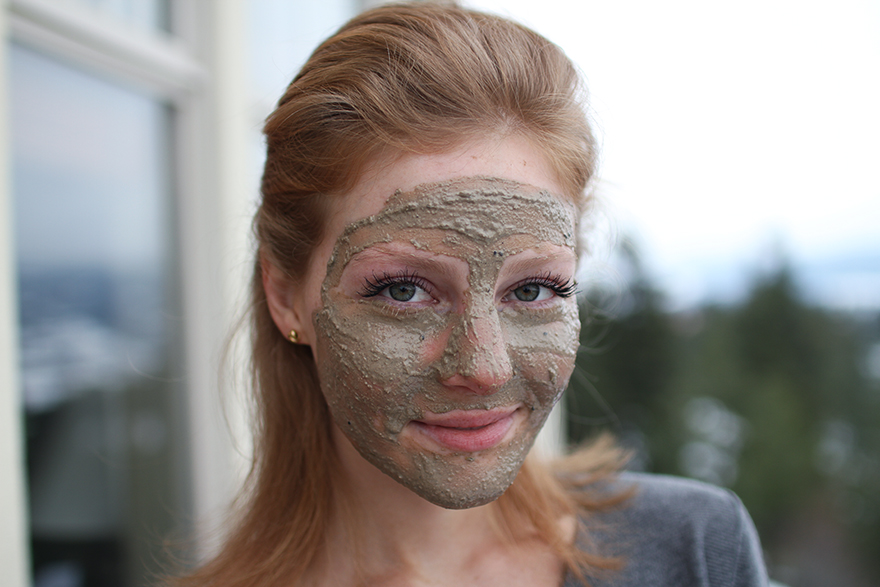
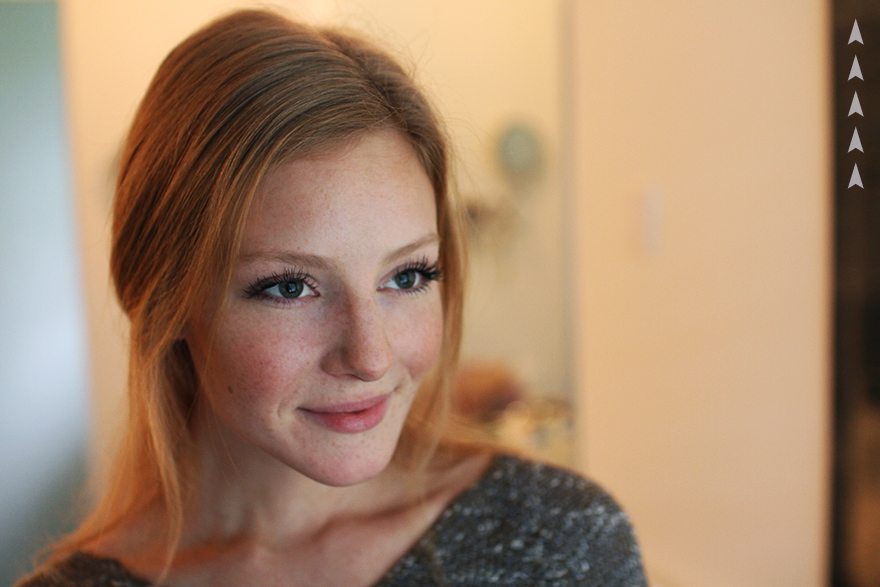
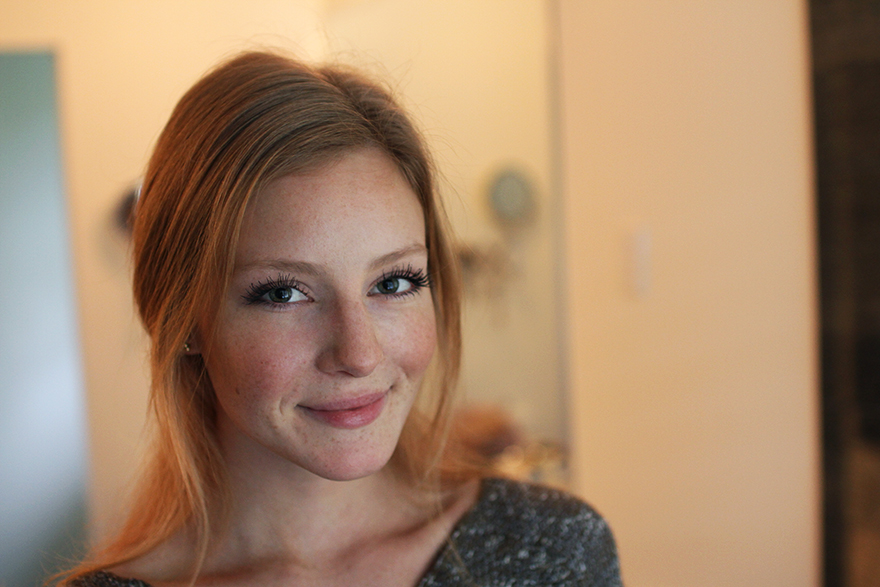
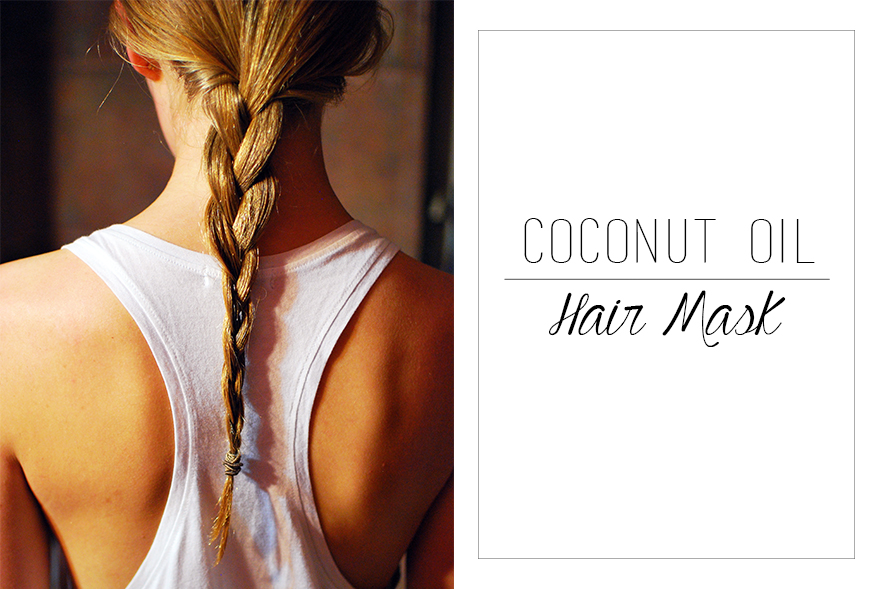
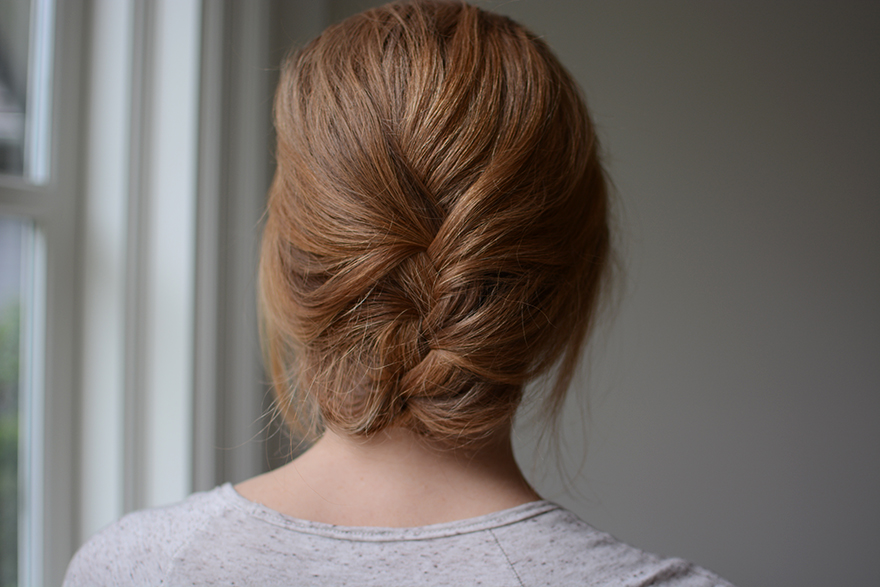
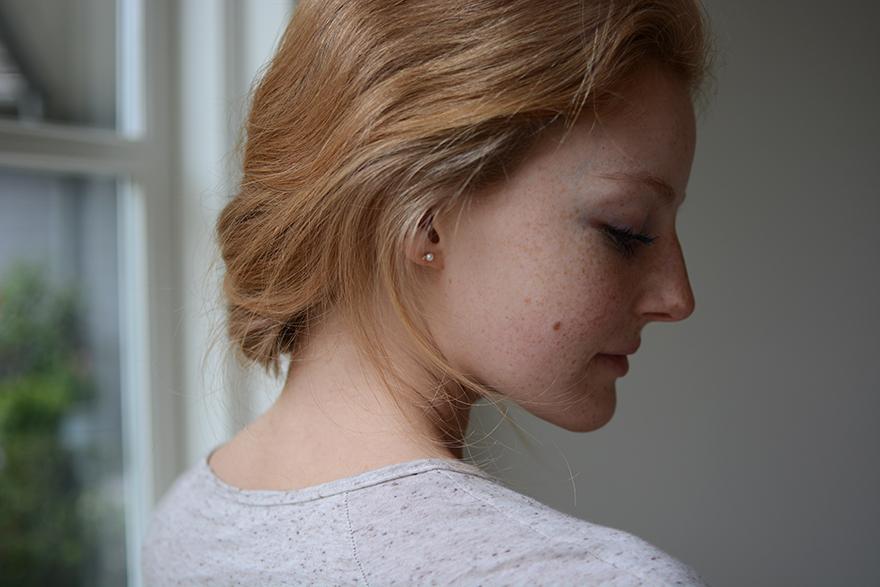
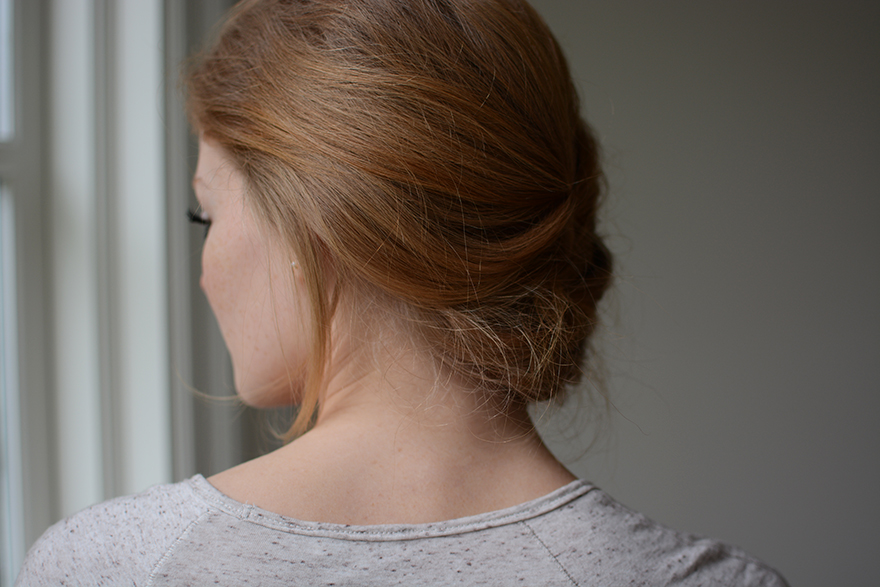
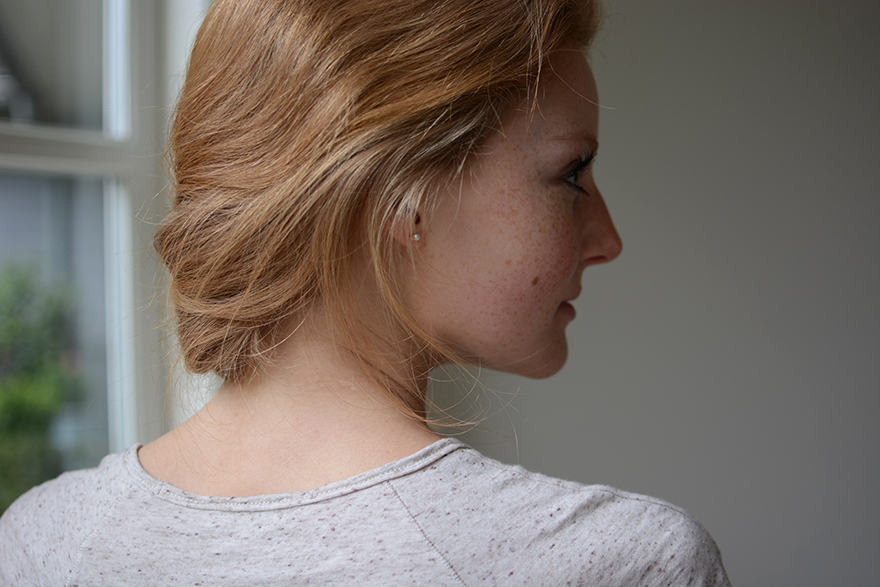
That being said, I am already restless after one day of doing nothing haha. So I did my hair this morning to show you one of my favourite casual updo looks! This one is perfect if you have shorter hair or a “lob” like I do. If you have long hair this one won’t work so well (sorry!!)

One of the big reasons I like to do this hairstyle is because it can look so casual or so dressed up. It really just depends what you are wearing! For example, right now I am lazing about my house with my hair like this and it feels just perfect. It would be just as awesome though if I was going out and was all fancy-shmancy and stuff. :p

Alrighty so how do you make this hair style happen? Here’s the skinny:

  • Lightly add a bit of hairspray to the middle/end parts of your hair, and brush it through.
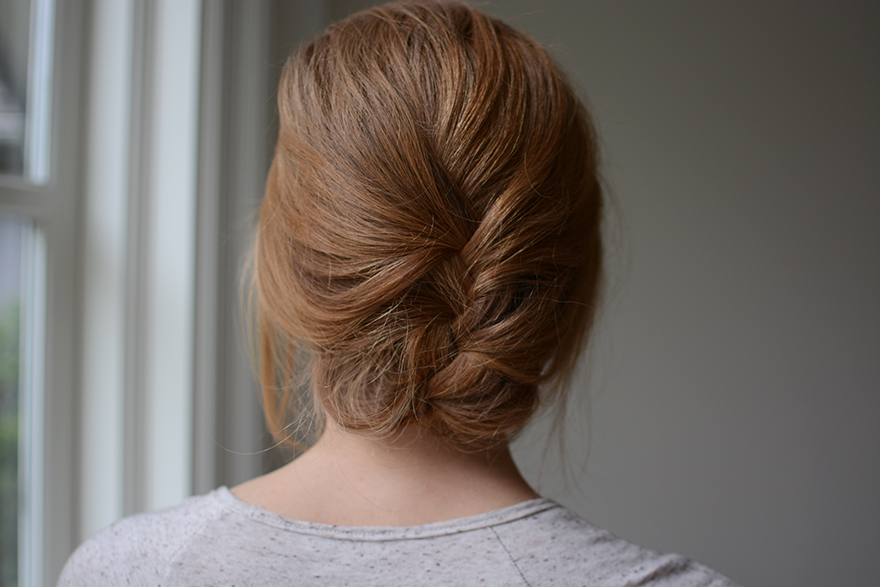
  • French braid your hair, and tie it with a hair tie at the end.
  • Take the end of your braid, and tuck it under the base of the braid.
  • Take a butterfly clip (or a few bobby pins) and pin this in place.
  • I like my hair to be a little bit messy usually (okay if I am being honest I like it a lot messy lol) so take your fingers and “mess up” the braid a little bit and pull out a few little pieces of hair.

And thats it! So simple. Totally in love with this hair style because it is such an easy way to make yourself look glam in just a few minutes. This took me a grand total of 5 minutes to do, maximum! So for those of you who are busy women (like myself) and don’t have time to spend hours doing your hair, this one is for you.

Let me know what you think of this hairstyle!


x,


Robyn-Signature

12:00 | March 12, 2015

AT HOME SPA

Beauty

Pink-Salt-6

Pink-Salt-5

Pink-Salt-4

Pink-Salt-7

Pink-Salt-2


I absolutely love doing at home spa treatments. They are such a great way to relax mid-week and treat yourself. It is sooo important that we make ourselves feel special and cared for, so that we can properly relax and feel like the queens that we are. There are so many things you can do at home for almost no cost, that will leave you feeling refreshed and relaxed. I wanted to share this trick that I do about once or twice a week, depending on how much time I have.

Having a pink Himalayan sea salt bath is so relaxing and makes me feel like a new womannnnn. Lol! It really does. And there is a reason I feel so awesome after having one of these pink salt baths. Pink Himalayan sea salt is a magical thing. Himalayan salt comes from bodies of water located in the Himalayan Mountains. Putting the salt in your bath mimics the feeling of ancient seas (<– which is AWESOME! No?)

So… what does adding pink Himalayan sea salt to your bath do? Here’s the skinny:

  • It supports weight loss, detox, and balanced hormones.
  • Himalayan pink sea salt also improves your skin’s look, texture, and tone.
  • It provides you with 84 essential minerals and trace elements that can dissolve in water, and will absorb into your blood stream when you are in your salt bath!
    • These minerals and trace elements are essential to our health and well-being.
  • Pink Himalayan salt is also known to soothe muscle aches and pains, which is great after a long workout!
  • Have your Himalayan pink salt bath before bed, and you will notice a significant difference in the quality of your sleep!
  • And finally, it has been said that it reduces stress. Which is alwaysss a good thing 🙂

It is so cozy to have an at-home spa day (or evening,) and something as simple as adding pink Himalayan sea salt to your bath and lighting a candle can make a world of difference. I always feel so much more relaxed and calm after doing this. To have a pink Himalayan sea salt bath, I add about ¾ cup of salt to my bath. And there you go! At home spa. The perfect mid-week relaxation treat. 🙂

Lots of love <3


x,


Robyn-Signature


5:30 | February 22, 2015

NEW NAILS

Beauty

Nail-2

Nails-1

Nails-3


Okay so I have probably been the worst person ever at taking care of my nails over the past few months. For a while there I was really good about getting them done on a regular basis, but in the “nail world” I totally “let myself go”. Is that a thing? Let’s make it a thing.

Pretty nails make me happy. (Shocker, I know.) And if something makes you happy, you should do it! So I am going to make the effort to get my nails done on a regular basis now as part of my beauty routine. Might as well 🙂

Other than getting my nails did this weekend, I spent lots of time with family and friends. Had a birthday party, brunch, and some bestie time. There are lots of exciting things planned for the week ahead, and I can’t wait to share with you guys!

Alrighty team, time to watch the Oscars! So many beautiful dresses…. crying a little inside but I’ll be fine, don’t worry about me at all. 😉 Ok talk soon! <3


x,


Robyn-Signature

1:30 | February 5, 2015

LUSH FACE MASK

Beauty

Skinny-Belle-32

Skinny-Belle-30

Skinny-Belle-31

Skinny-Belle-36

Skinny-Belle-34

Skinny-Belle-35


Today I wanted to share my favourite Lush face mask. This mask is seriously the best! I have been using it for years now, and love how it makes my skin look and feel. The mask itself is meant to reduce the look of wrinkles and fine lines. Hence I use it about twice a week, almost every week! And it is au-natural. So so into it.

This face mask is called Ayesha, and it costs about $7. It always is nice to treat yourself to a little at-home spa experience. I find I rarely make enough time for myself, and having this as part of my beauty routine forces me to take 15 minutes and just enjoy the relaxing face mask. 🙂

What do you guys do for your at-home spa treatment?


x,


Robyn-Signature

1:00 | January 29, 2015

BEAUTY SLEEP

Beauty

Beauty-Sleep-1

Beauty-Sleep-5

Beauty-Sleep-2

Beauty-Sleep-4

Beauty-Sleep-3


When I was putting this post together, I seriously debated taking some “sleeping” photos of myself. Then I thought about it, and basically every single photo you see of someone “sleeping” on the internet (if they look half decent while doing it) is a lie. They are fully awake and probably have a room full of people telling them which is a more flattering “sleeping” position. ANYWAYS, I decided to spare you guys the pain of fake sleeping photos of myself and share these old modeling pics instead. (I look totally natural, I’m aware.)

Okay back to the point of this post. BEAUTY SLEEP. You need it, I need it, we all need it. Quality and quantity of sleep have a direct effect on your physical and mental state of being. Nobody likes a cranky-pants, so don’t be that person. And, studies have shown that getting between 7 – 9 hours of sleep a night is a highly powerful beauty treatment! What?? You heard me. Get pretty by sleeping. (Sign. Me. Up.)

Here’s the skinny on beauty sleep:

  • Smoother skin. While you sleep, your skin cells regenerate and muscles that cause wrinkles will relax. This will promote that beautiful wrinkle-free look. 
  • A lack of sleep increases inflammatory cells in the body and leads to an increase in the breakdown of collagen. Collagen is one of the primary structural building blocks of your skin, and the more collagen you have the better your skin looks! Learn more here
  • Not enough sleep actually accelerates the aging process. Don’t give you skin cells enough time to repair? Each day of sleep deprivation will cause your skin cells to slowly break down (and this effect accumulates over time.) Bad. News. Bears.
  • Too little sleep contributes to weight gain. I always notice that when I am tired I eat more (and make poorer food choices) because I think I need the extra energy because my body is so exhausted from the lack of sleep.
  • If you don’t get enough sleep your blood vessels dilate, which causes dark circles under your eyes to form.
  • Too much sleep also has negative health effects! Anything over 9 hours can be just as detrimental to your skin as not enough sleep. Oversleeping increases skin cell breakdown.

As you can see there are so many reasons that you should set aside enough time to sleep at night! I am a huge baby when it comes to sleeping, and will literally be the grumpiest person ever if I am short on sleep for a night. Let me tell you… not pleasant for anyone involved haha. So let’s set aside those 7 – 9 hours a night, and sleep ourselves pretty! 


x,


Robyn-Signature

6:14 | January 20, 2015

GELATIN: THE NATURAL BOTOX

Beauty

Gelatin-3

Gelatin-2

Gelatin-1


Okay so I stumbled across GOLD the other day. There is no way that I was not going to share this with you guys. I may or may not have been Googling natural wrinkle prevention solutions. (It happened, just accept it.) I am all about prevention of wrinkles and am always looking for way to keep my skin wrinkle free. On this particular day, I was feeling like I needed to amp up my regular beauty routine a little bit.

What did I find?! GELATIN. I literally have no idea how I did not think of this before. Gelatin is basically a way to reduce (yes, REDUCE) the look of wrinkles. Kind of like botox… but no needles here. I am definitely not a medical expert, so I did my research and from what I can see gelatin really does reduce the look of wrinkles!! And obviously I just had to share the love with you. Want to know what other amazing things gelatin can do for you?

Well, here’s the skinny:

  • First and foremost… reduce the look of wrinkles!! Even with sun exposure!!! **Happy dance**
  • Supports hair and nail growth! Again… amazing! If you have weak hair or nails, gelatin could be the fix.
  • Gelatin is also known to improve your digestion.
  • A minimal source of protein (protein is still protein so yay!)
  • It is great for bone strength, and can help improve joint pains. I often get sore hips from running, so this is perfect for me!
  • Gelatin can help detox your liver!

Okay so how does all this business work?

Gelatin is basically a colorless, tasteless, and water-soluble protein prepared from collagen! You know, that stuff that is put in skin creams and costs the price of a brick of gold? Ya, collagen skin cream. That’s a big no-no. And here’s a little fun fact… collagen can’t even be absorbed through the skin! So hah! No more expensive creams for us.

Okay so, what is collagen? Collagen is the main structural protein found in grass-fed animal connective tissue. According to this study, “collagen is one of the primary structural elements of your skin, and providing the building blocks for this important protein can ensure that your body is able to create enough of it.”

After reading a lots of studies just like the once I referenced above, and I basically whipped out my credit card right there and ordered some gelatin pills online. Click here to see which gelatin capsules I ordered (5 bottles, to be precise haha.)

What other ways can you make gelatin a part of your diet? You can order the powder straight up and just mix a tablespoon or so into your tea at night! And the last (and best option in my opinion) are the gummy jellys!!! Adult gelatin gummy bears? Yes. Please. (I may or may not already take an adult gummy bear multi-vitamin every day… they are awesome, just saying.)

I have been taking my little gelatin capsules religiously for about two weeks now and have already started to notice a bit of a difference!! Literally can’t believe it took me this long to discover this secret.

Be sure to do your own research and see if taking gelatin is right for you! This is just what I have found works best for me 🙂 ***Also: if you haven’t noticed yet, this is NOT a vegetarian product!


x,


Robyn-Signature

6:32 | January 6, 2015

5 MINUTE MAKEUP

Beauty

5-min-makeup-2

5-min-makeup-1


Having a clean and simple 5-minute makeup look is a total necessity for me. If you are running late for work, school, or just life in general (it happens to the best of us,) this is a great way to look polished and put together in only a few minutes.

Before we dive on into things here, I feel the need to share my “daytime makeup philosophy” with you. LESS. IS. MORE. (<– bold anddd italicized because it is THAT important!) I am all about keeping my makeup as natural and simple as possible during the daytime. That way you can show off your natural beauty, and pretend like you don’t wear makeup at all. (AKA the lies we tell men all the time haha! I still maintain a strong front to my boyfriend that I never wear makeup 😉 )

Makeup is supposed to enhance your natural beauty, not cover it all up. Soooo, to look your most gorgeous during the daytime, be sure your makeup is bringing out your best features and not hiding them!

For my first makeup tutorial I will start with this super simple makeup look that is literally done in less than 5 minutes. This is important for efficiency queens like ourselves, because we obviously have important things to do and people to see! 😉

Here’s the skinny on how to get my 5-minute makeup look:

1) Start by applying a light powder to your whole face. Get it alllll over! Your eyelids and everything.

2) Next, contour your face by adding your bronzer. Go heavier on the bronzer on the frame of your face and just below your cheekbones to get a more defined look. My fave bronzer is Chanel’s “Healthy Glow Sheer.”

3) Eye shadow time! All you do here is take a light matte color, and put it in your inner eye lid and just below the arch of your eyebrow. This will open up your eye and make it look brighter. The Naked Basics palette (featured in the photos above) is my go-to shadow set for the day. As you can see I use the “W.O.S” shade every day haha.

4) Now take a slightly darker color (neutral and matte as well) and carefully blend it in to the crease of your eyelid to make those big beautiful eyes pop! I used “Naked 2” from my Naked Basics palette. 

5) Last step!! (See? I told you this was ridiculously easy) Mascara!!! This is the holy grail of makeup. For me, it is the most important step of all. I could skip all the rest and still be happy with just mascara haha. So apply your mascara evenly right from the base of your lashes all the way up. It is super important to get the mascara right down the base of your lashes, especially if you have light coloured hair. This way you wont have any awkward blonde lashes peeking out at the roots. I have used the same mascara since forever, and it is…. * drum roll * Lancome Hypnose!! It is seriously the best. Just go buy it now, and you won’t regret it… promise!

And you are done!! This look is really simple, and is a super quick fix for anyone who is in a rush. Nobody will know that you spent less than 5 minutes getting ready, and you can get along with ruling the world, like I know you do 😉

Give this quick look a try, and tell me what you think in the comments below!


x,


Robyn-Signature

5:23 | November 26, 2014

HAIR WASH ROUTINE

Beauty

Hair-Wash

Hair-Wash-1


When I thought about writing this post, I debated with myself if I really needed to share my hair washing routine with the world. Yes, yes I do. I am basically morally obligated to tell you this. Haha! 😛 Since we are talking about hair today, I figured I would share some crazy hair photos from my modeling this summer in Milan (shot by the amazing Attilio Cusani!)

Okay let’s get down to it. I only wash my hair 2 – 3 TIMES A WEEK. Max. I can hear you now… “Eeeewwwww! You only wash your hair 2 – 3 times a week? Nasty.” Okay now, it’s not nasty!! Let me explain.

The more you wash your hair, the greasier it gets. So if you wash it every day, your hair will become accustomed to getting its daily wash and actually end up being oilier than before. So, it is better to wash your hair every few days, and get your scalp used to less frequent washing.

Another reason you should only wash your hair a few times a week is to keep it healthy. The more you wash your hair with harsh chemicals (found in shampoo and conditioner,) the more damaged it will become. It is really good to let the natural oils in your hair condition it a bit!

Keep in mind that this is what works best for me! All hair types are different and the ideal hair-care routine changes based on your hair type. I have quite dry and fluffy hair so I find that mine looks better when I wash it every few days.

To make sure my hair stays soft, I also like to do my Coconut Oil Hair Mask once every few weeks.

There you have it, friends! What is your hair care routine?! Tell me in the comments below!


x,


Robyn-Signature

2:52 | October 28, 2014

COFFEE SCRUB

Beauty

Coffee-Face-Srub-Coconut

Coffee-Face-Scrub

Coffee-Face-Scrubber

Coffee-Scrub

Coffee-Facial


Today is the day I put coffee on my face and posted it on the World Wide Web. I wouldn’t have done this if this recipe wasn’t one of the best beauty secrets I have. Coffee has major benefits for your skin, and by putting it directly on the surface of your skin you are maximizing these benefits! So, why should you put coffee on your face?

Here’s the skinny:

1) The caffeine in coffee has major anti-inflammatory properties so it reduces redness and puffiness on your face. This also helps with those pesky under-eye circles!

2) Coffee is full of antioxidants that increase your skin’s natural protection and defense levels from things like pollution in the air.

3) It has also been shown that coffee has properties that signal tissue repair, so putting it on your skin leads to increased hydration through cell re-growth.

To make this scrub, just mix together ground coffee and coconut oil. From the photos you can see that I used a coarse ground coffee (I felt like I needed some extra tough exfoliation today haha) but it’s probably better to use regular fine ground coffee. Mix the coffee grounds and coconut oil together then very gently apply to your face and rub it around in little circles. Wash it off, dry your face, and that’s it! You don’t need to moisturize your skin after (at least I didn’t!) because the coconut oil will do that for you.

If you are craving some extra soft and beautiful skin, give this scrub a go! It is great for your whole body 🙂


x,


Robyn-Signature

11:58 | October 21, 2014

COCONUT OIL HAIR MASK

Beauty

Coconut-Oil

Simple-Hair-Mask

Coconut-Oil-Hair-Mask


Every few weeks I do a coconut oil hair mask to keep my hair moisturized, smooth, and healthy. I have super dry hair so it’s really important for me to keep up this routine to keep my hair soft, and not feeling like a stack of hay haha. So, if you’re like me and have really dry or damaged hair this one-ingredient hair mask will keep your hair feeling silky and smooth! If you are one of the lucky ladies who has thick healthy hair, this is also a great shine booster every once and a while if you want some extra glisten in your beautiful long locks.

Let’s get down to it. This is literally the simplest hair mask ever haha, which is part of the reason I love it so much. We are all busy women, and definitely have more important things to do than fiddle about making a complicated hair mask. Know what I mean??

So, here’s the skinny:

1) Buy some virgin coconut oil. Make sureee it’s virgin. Virgin oil is a higher quality oil that is made of just the pressed fruit without any additives. Aka, it is more natural and all around better for you!

2) Before you go to bed put the lots of coconut oil on the TIPS of your hair. The worst (driest) part of your hair is the part where you should apply the most oil, then work your way up until you have covered all the most damaged parts of your hair. If you put it all over your head (up to the roots) it will take FOREVER to wash out. Trust me, I took one for the team and tried it… just, don’t do it haha.

3) Put your oiled up hair (lol) into a braid and sleep overnight on it. I usually don’t cover my hair with anything because if the oil gets on your pillow it’s actually really good for your skin anyways. 🙂

4) Wash your hair in the morning as usual and enjoy your refreshed silky hair!

This hair mask has worked wonders for me, and I love how simple it is! Doesn’t get much easier than one ingredient LOL! 😉 Give this a go and let me know what you think!!


x,


Robyn-Signature